How to Choose Outdoor Play Equipment for Your Business?
Choosing outdoor play equipment is a business decision, not just a design choice. A climbing frame, swing, or sensory panel must suit the children who will use it, the space available, and the staff responsible for daily checks. It also needs to withstand weather, frequent use, and the occasional missed inspection. Small details matter: clear sightlines, stable surfacing, and enough room around moving equipment can shape both play and supervision. The right setup can invite children in. The wrong one can become an expensive corner of the yard.
Evidence can help guide the choice. A U.S. Consumer Product Safety Commission analysis estimated an average of about 218,000 emergency department-treated injuries associated with playground equipment each year from 2001 to 2008 among children under 18. This is historical data, not a current forecast, but it underlines why safety and maintenance belong in the buying conversation. In its 2018 clinical report, “The Power of Play,” pediatrician Dr. Michael Yogman and co-authors wrote, “Play is not frivolous: it enhances brain structure and function.” That is a useful reminder for business owners: equipment should support meaningful play, not simply fill space. This guide will help you compare durability, age suitability, accessibility, layout, maintenance needs, and total cost. Some decisions will still depend on your site and your staff. That is worth admitting. A thoughtful choice starts with real observations of how children use the space, then checks those observations against reliable guidance and the supplier’s specifications.
Define Your Users and Match Equipment to Age-Group Designations
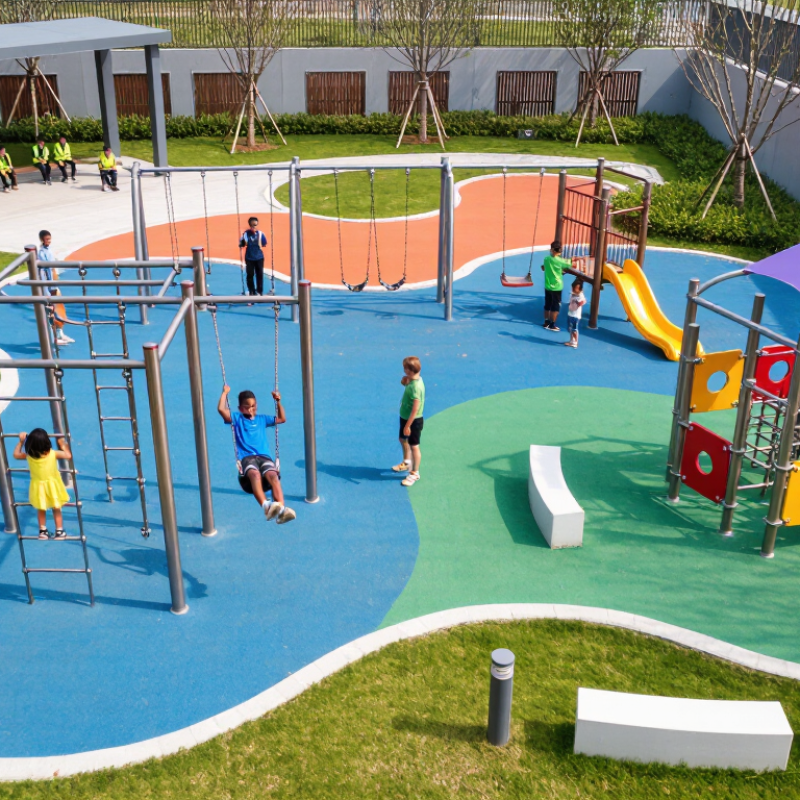
Before comparing structures, identify who will use the space and how they arrive. A daycare serving toddlers needs different movement challenges than a café welcoming school-age children. Watch first. Observe where children gather, how long they play, and whether caregivers can see each area. Ask staff about busy periods, common mobility needs, and the ages they actually serve. A sign saying “all ages” can hide important differences in reach, balance, and confidence. That matters.
Match each piece to its stated age range, then compare its required skills with users’ abilities. Preschoolers may need low platforms, broad steps, and simple routes; older children often seek height, speed, and more complex movement. Do not rely on age labels alone. Review supplier documentation for user capacity, fall zones, surfacing, and supervision requirements, and confirm the layout leaves clear sightlines. For mixed-age sites, separate fast-moving equipment from toddler areas without making caregivers choose which group to watch. One assumption may be wrong: children of the same age can differ widely in strength or sensory comfort. Test the plan with staff, then adjust it after observing real play.
How to Choose Outdoor Play Equipment for Your Business
Start by identifying the children who will use the play area, then select equipment designed for their age group.
The bars show the age ranges in the U.S. Consumer Product Safety Commission’s playground age-group designations. Choose equipment labeled for the intended users; examples include low platforms and crawl spaces for toddlers, and more challenging climbing structures for older children.
Source: U.S. Consumer Product Safety Commission, Public Playground Safety Handbook.
Screen Products Against ASTM F1487 Public-Use Playground Requirements
Choosing outdoor play equipment for a business starts with who will use it and how. ASTM F1487 sets safety requirements for public-use playground equipment intended for children ages 2 through 12. Ask suppliers for documentation showing how each product addresses the standard’s requirements, including structural strength, entrapment openings, protrusions, guardrails, and use zones. Check the stated age range against the children who will actually visit. A drawing helps.
CPSC’s Public Playground Safety Handbook reports an estimated 205,850 children under 15 received emergency-room treatment for playground-equipment injuries in 2001.
That figure is dated, but it shows why careful screening matters. Review the equipment layout and its fall zones, not just the product specification sheet. Also assess impact-attenuating surfacing against ASTM F1292; F1487 alone does not establish that the installed surface provides adequate impact protection.
Still, paperwork is not the playground. Ask how installation instructions, inspection access, and maintenance needs will work at your site. Look for pinch points near moving parts and openings where a child’s head or torso could become trapped. A product can meet a standard and still be poorly suited to a crowded, high-use setting. Compare the supplier’s documentation with the site plan, and resolve any unclear details before purchase.
Plan Surfacing Around the CPSC’s 6-Foot Use-Zone Baseline
Plan surfacing before choosing the equipment layout. The CPSC’s Public Playground Safety Handbook sets a six-foot use-zone baseline around most stationary equipment. Measure outward from the equipment’s outer edges, not from its posts. Swings and some other equipment need larger, equipment-specific zones. A crowded site plan can quietly erase those clearances.
Falls matter. CPSC injury data from 1999 estimated that falls caused about 79% of playground-equipment injuries treated in emergency departments. The figure is historical, not a current annual rate, but it explains why surfacing deserves careful planning. Use impact-attenuating material tested to ASTM F1292, and match its critical fall height to the equipment’s fall height. Loose-fill depth can shift as children move it. Inspect high-traffic spots near slide exits and beneath swings.
Keep the use zone free of benches, edging, trees, and hard borders. A tape measure helps. So does a walk-through. Check the space from a child’s viewpoint: where do feet land, and where might a child run? The six-foot rule is a baseline, not a complete design. I would recheck the layout after installation; plans can look generous on paper and feel tight in the yard.
Design Accessible Ramps to ADA’s 1:12 Maximum Slope
When choosing outdoor play equipment for a business, plan the accessible route before fixing the layout. The U.S. Access Board’s 2010 ADA Standards set a maximum ramp running slope of 1:12: every inch of rise requires at least 12 inches of horizontal run. A 24-inch rise therefore needs 24 feet of sloped ramp, plus level landings. Each ramp run can rise no more than 30 inches. Small details matter. Keep the clear width at least 36 inches, and provide landings at the top and bottom that are at least 60 inches long.
The Access Board’s accessibility guidance also helps teams evaluate routes through play areas, not just the ramp itself. Check that the route reaches accessible play components and remains usable beside equipment, gates, and seating. In the field, measure the finished slope with a level or inclinometer; drawings cannot reveal every change in grade. Water pooling at a landing can make a compliant route difficult to use. One point worth reconsidering: a ramp that meets the maximum slope may still feel tiring, especially over a long distance. Where space allows, a gentler slope, firm surface, and clear turning areas can make the route more comfortable. Refer to ADA Standards sections 405.2, 405.5, and 405.7 during design review.
Compare Lifecycle Costs, Inspection Needs, and Warranty Terms
How to Choose Outdoor Play Equipment for Your Business?
Compare Lifecycle Costs, Inspection Needs, and Warranty Terms
Equipment price is only the starting point. Include delivery, surfacing, installation, routine inspections, replacement parts, and repair labor in your multi-year estimate. A lower quote may cost more if a worn swing seat takes weeks to replace. Downtime matters. Keep a repair reserve.
Ask what inspections the equipment needs and who can perform them. Daily visual checks can reveal loose bolts, sharp edges, or damaged surfacing. More detailed inspections should follow the supplier’s schedule, with dates, findings, and repairs recorded. High visitor numbers, coastal air, and strong sun can increase wear. It is easy to overlook these conditions when comparing quotes.
Compare warranty terms item by item. Check coverage periods for frames, coatings, moving parts, labor, and shipping. Note exclusions for normal wear, corrosion, or improper maintenance. A long structural warranty may not cover the parts that fail most often. Ask how claims are submitted and how quickly replacement components are usually available. Do not treat warranty coverage as a maintenance plan; that assumption can leave a play area closed while costs continue.